Installing stop valves for PVC pipes is a crucial task in plumbing and water filtration systems. Stop valves allow you to control water flow and isolate sections of the system when necessary, such as during repairs or maintenance. They are essential in any piping system, providing convenience and safety. In this guide, we will walk you through the steps involved in installing stop valves for PVC pipes.
Tools and Materials Needed
Before you start, make sure you have all the necessary tools and materials to complete the installation. Here’s a list of what you’ll need:
Tools
- Pipe Cutter: To make precise cuts on the PVC pipe.
- Measuring Tape: To measure the required length of the pipe for proper installation.
- Wrench: To tighten fittings and connections.
- Deburring Tool or Sandpaper: To smooth the cut edges of the PVC pipe for a clean seal.
- Brush or Cloth: To clean the surfaces before applying primer and cement.
Materials
- PVC Primer: Used to prepare the surface of the pipe and fittings for proper adhesion.
- PVC Cement: Used to bond the valve and pipe securely.
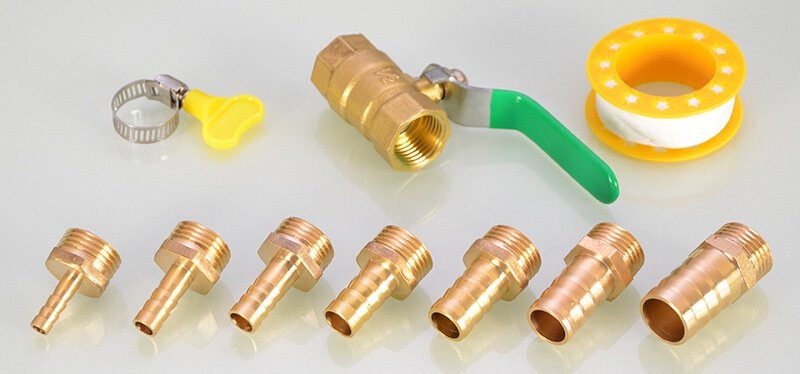
- Stop Valve: Choose the appropriate valve based on your system’s requirements (we’ll cover this in detail in the next section).
Make sure to check that your stop valve is compatible with the PVC pipes you’re using. Having the right tools and materials will help ensure that your installation goes smoothly.
nderstanding the Stop Valve Types
When installing stop valves for PVC pipes, it’s important to understand the different types of valves available and their specific uses. Choosing the right valve for your system will ensure that it works effectively.
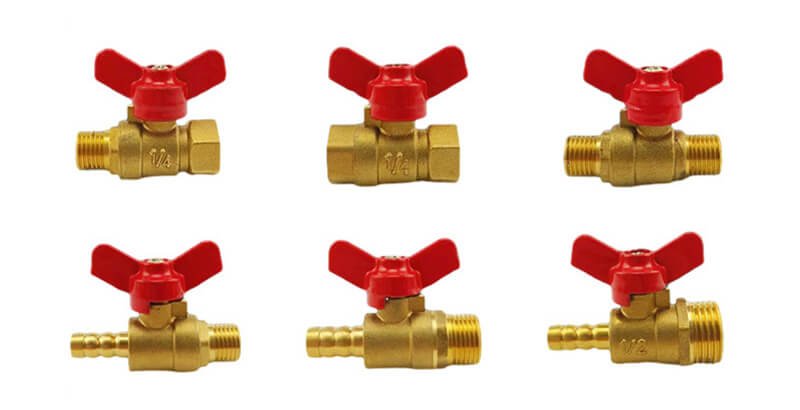
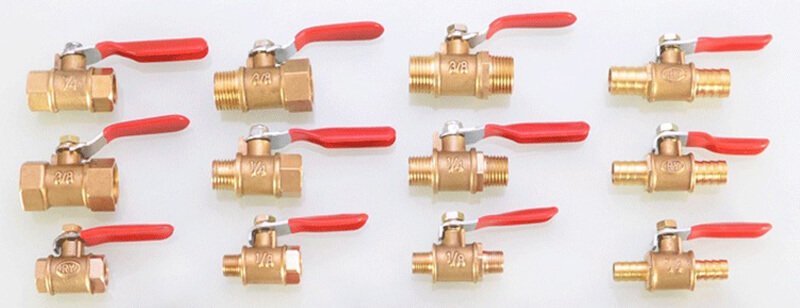
Ball Valves
Ball valves are one of the most commonly used stop valves for PVC systems. They feature a hollow, perforated ball that controls the water flow. When the valve handle is turned, the ball rotates, either allowing or blocking the flow of water. Ball valves are durable, easy to operate, and provide a tight seal, making them a great choice for residential and commercial systems.
Gate Valves
Gate valves use a sliding gate mechanism to control water flow. When the valve is fully open, water flows freely; when it is closed, the gate blocks the flow. These valves are ideal for systems where you need to fully stop or fully open the water flow. However, they are not as quick or easy to operate as ball valves.
Globe Valves
Globe valves are designed to regulate flow, allowing precise adjustments. They have a moving disk that adjusts the size of the opening, making them suitable for systems where water flow needs to be regulated rather than just turned on or off.
Check Valves
Though not used to stop flow in the traditional sense, check valves are another type of valve commonly used in water systems. These valves allow water to flow in one direction only, preventing backflow and ensuring that water doesn’t return to the source.
Preparing the PVC Pipe
Proper preparation of the PVC pipe is key to ensuring a strong, leak-free connection. Follow these steps to prepare the pipe for installation:
Measuring and Cutting the Pipe
The first step is to measure the section of the PVC pipe where the stop valve will be installed. Use a measuring tape to ensure accuracy. Once measured, use a pipe cutter to cut the pipe cleanly. Ensure the cut is straight and even for the best results.
Cleaning and Smoothing the Edges
After cutting, the pipe edges can be rough or have burrs that might interfere with the connection. Use a deburring tool or sandpaper to smooth out the edges. This will help create a clean, tight seal when you apply the primer and cement.
Cleaning the Pipe and Valve Fittings
Before applying primer and cement, it’s important to clean the ends of the PVC pipe and the inside of the valve fittings. Use a clean cloth to remove any dirt, dust, or debris. A clean surface will allow the adhesive to bond more securely, reducing the risk of leaks.
Installing the Stop Valve
Now that your PVC pipe is prepared, it’s time to install the stop valve. Follow these simple steps for a secure and effective installation:
Step 1: Apply PVC Primer
Start by applying PVC primer to the cut ends of the pipe and the inside of the valve fitting. The primer helps to soften the PVC, which allows the cement to bond more effectively. Use a clean brush to apply a thin, even layer of primer to both the pipe and the valve fitting.
Step 2: Apply PVC Cement
Next, apply PVC cement to the same areas where you applied the primer. Be sure to use a generous amount of cement to ensure a secure bond. You can apply the cement with the same brush used for the primer. The cement should be applied immediately after the primer while the surfaces are still wet.
Step 3: Attach the Stop Valve
Quickly slide the valve fitting onto the prepared pipe. Push the fitting firmly onto the pipe while turning it slightly to ensure a tight connection. Hold it in place for a few seconds to allow the cement to begin bonding. Make sure the valve is in the correct orientation, with the handle in a convenient position for operation.
Step 4: Check for Proper Alignment
After the valve is in place, double-check that it is properly aligned. Ensure that the valve handle is easily accessible and that the flow direction is correct. This is important for smooth operation once the system is up and running.
Testing the Installation
Once the stop valve is installed, it’s essential to test the installation to ensure everything is functioning correctly and there are no leaks. Here’s how to do it:
Turn On the Water Supply
First, turn on the water supply slowly to allow water to flow into the system. Start by opening the valve in the fully open position to check that water flows freely through the pipe. This step ensures that the valve is installed in the right direction and is capable of controlling the flow of water.
Check for Leaks
While the water is flowing, inspect the areas where the valve connects to the pipe. Look for any signs of leaking around the joints. If you see water seeping out, the connection may not be tight enough or the cement may not have bonded properly. In that case, you may need to reapply cement or reattach the valve.
Test the Valve Operation
Next, close the valve by turning the handle to ensure it shuts off the water flow completely. Open it again to make sure it operates smoothly and that there are no obstructions. The valve should work easily without resistance.
Troubleshooting Common Issues
While testing your installation, you may encounter some common issues. Here’s how to troubleshoot them:
Leaks at the Connection
If you notice leaks at the valve connection, here’s what you can do:
- Reapply PVC cement: If the cement bond didn’t set properly, remove the valve, clean the surfaces, and reapply the primer and cement.
- Tighten the connection: If the valve fitting was not tightened enough, gently tighten it with a wrench, being careful not to damage the PVC pipe.
Valve Doesn’t Close Completely
If the valve is not closing properly:
- Check for debris: There may be dirt or debris inside the valve mechanism. Clean it carefully.
- Examine the valve seat: The valve’s internal parts might be damaged or misaligned. If this is the case, replacing the valve may be necessary.
Difficulty Operating the Valve
If the valve feels stiff or hard to turn:
- Lubricate the valve: Apply a small amount of plumbing grease to the valve handle and moving parts to help them operate more smoothly.
- Check for alignment: Ensure that the valve is properly aligned and isn’t obstructed by nearby pipes or fittings.
Maintenance and Care
Proper maintenance and care will ensure that your stop valve remains in good working condition for years to come. Here’s what to do:
Regular Inspection
Inspect your stop valve and the surrounding pipework regularly. Look for any signs of wear and tear, such as cracks in the valve body or pipe. Early detection of issues can save you time and money on repairs.
Clean the Valve Periodically
To keep the valve operating smoothly, clean it periodically. Remove any debris from the valve’s exterior and wipe it down with a damp cloth. If the valve is used frequently, consider lubricating the moving parts to ensure ease of operation.
Check for Leaks
Even if you don’t notice any problems, always check for small leaks around the valve connection after using the system. If you notice any moisture, tighten the valve connection or reapply cement.
Conclusion
Installing stop valves for PVC pipes is an essential skill for any plumbing project. By following the steps outlined in this guide, you can easily and effectively install a stop valve that will help regulate water flow and ensure the functionality of your water system.
Regular testing, troubleshooting, and maintenance are key to keeping the valve in top condition, preventing issues before they arise. Whether you’re a DIY enthusiast or a professional plumber, proper installation and care of stop valves will help you maintain a leak-free and reliable water system.