CNC machines rely on coolant systems to maintain performance and extend tool life. The coolant pipes play a crucial role in delivering coolant fluid to the machine’s cutting area. Over time, these pipes may need to be joined or disconnected for maintenance, repairs, or adjustments.
In many cases, joining and parting coolant pipes can be done without the need for special tools. This guide will show you how to handle these tasks quickly and easily, saving you time and money while maintaining the integrity of your CNC system.
Methods to Join Coolant Pipes Without Special Tools
Joining coolant pipes without special tools is easier than you might think. There are several effective methods you can use to create a secure connection without the need for expensive or complex equipment.
Using Barbed Fittings
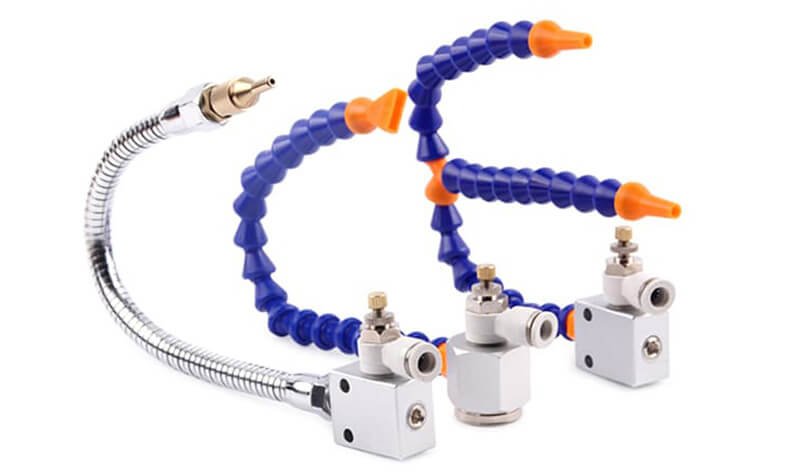
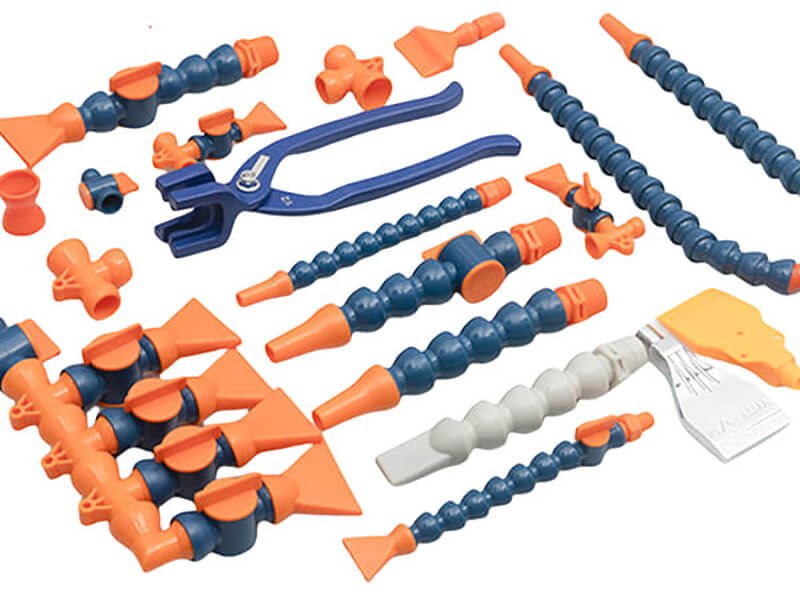
One of the most common ways to join coolant pipes is by using barbed fittings. These fittings have ridges or “barbs” that grip the inside of the hose tightly when it is pushed onto the fitting. Once the pipe is securely in place, you can tighten a hose clamp over the fitting to prevent leaks.
How to Use:
- Slide the flexible coolant pipe over the barbed fitting.
- Use a hose clamp to secure the pipe in place.
- Tighten the clamp with a screwdriver or wrench to ensure a leak-free connection.
Twist-lock Fittings
Another simple method is using twist-lock fittings. These connectors are designed to snap together, making it easy to join pipes without any tools. They are ideal for quick changes or temporary connections.
How to Use:
- Align the twist-lock fitting with the ends of the pipes.
- Twist the connectors until they lock into place, ensuring a tight seal.
Push-fit Connectors
Push-fit connectors are a great option for joining pipes without needing extra tools. These connectors allow the pipe to be pushed into place, where it locks securely and forms a seal. They are often used in situations where you need a quick, no-fuss connection.
How to Use:
- Simply push the end of the pipe into the push-fit connector.
- The connector will automatically grip the pipe, creating a secure seal.
Methods to Part Coolant Pipes Without Special Tools
Disconnecting or parting coolant pipes is just as easy as joining them. You can safely remove the pipes without the need for any special tools. Here are some simple methods to help you part your coolant pipes quickly and easily.
Cutting the Pipe
If you need to completely remove a section of coolant pipe, cutting the pipe is often the best option. You can use a pipe cutter, utility knife, or even scissors (for plastic pipes) to make a clean cut.
How to Cut:
- Mark the point where you want to cut.
- Use a pipe cutter or utility knife to make a straight, clean cut.
- Make sure the cut is smooth to avoid any damage to the pipe or fittings.
Disconnecting Fittings
If you are using barbed, twist-lock, or push-fit connectors, disconnecting the fittings is simple and doesn’t require any special tools. For barbed fittings, you may need to loosen the hose clamp first.
How to Disconnect:
- For barbed fittings, loosen the hose clamp with a screwdriver and slide the pipe off.
- For twist-lock fittings, simply twist the connector in the opposite direction to unlock it.
- For push-fit connectors, pull the pipe out of the connector, ensuring the seal isn’t damaged.
Removing Seals and O-rings
Sometimes, removing seals or O-rings is necessary when parting pipes. You can usually do this by gently prying the seal with your fingers or using a flathead screwdriver. Be sure to inspect the seal before reuse to avoid leaks.
Common Mistakes to Avoid
While joining and parting coolant pipes without special tools can be straightforward, there are a few common mistakes that can lead to leaks, damage, or other issues. Here are some key things to watch out for:
Improper Cutting of the Pipe
When cutting a coolant pipe, uneven cuts can cause issues when trying to reconnect the pipe. A jagged edge can result in poor sealing and potential leaks. Always ensure that the cut is straight and smooth.
Tip: Use a pipe cutter or utility knife to make clean, even cuts.
Not Securing Fittings Properly
If fittings like hose clamps or twist-lock connectors are not secured tightly, the connection could loosen over time, leading to leaks. Always make sure to tighten hose clamps securely and ensure that twist-lock fittings are fully locked.
Tip: Double-check all connections after tightening to ensure there is no movement.
Using the Wrong Size Fittings
Using fittings that are too large or too small for the pipe can cause weak connections. This can result in coolant leaks or even complete disconnections. Always ensure the fittings match the pipe size.
Tip: Measure the pipe and fitting sizes carefully before installation.
Forgetting to Inspect Seals
Seals or O-rings can wear out over time. If you forget to inspect or replace a damaged seal, it can lead to leaks. Always inspect seals during maintenance or disconnection.
Tip: Replace seals and O-rings regularly to maintain leak-free connections.
Maintenance Tips to Ensure Longevity
Proper maintenance of your coolant pipes and fittings will help ensure their longevity and efficiency. Here are some key tips for keeping your system in top condition:
Regular Inspections
It’s important to regularly check your pipes, fittings, and connectors for signs of wear or damage. Look for cracks, leaks, or signs of corrosion.
Tip: Schedule routine inspections to catch issues early before they lead to bigger problems.
Keep Fittings Clean
Dirt, debris, and build-up can affect the performance of your fittings. Clean your push-fit connectors, hose clamps, and other fittings to ensure they function properly.
Tip: Use a soft brush or cloth to clean fittings, and avoid using harsh chemicals that could damage the material.
Replace Worn Parts
Over time, some parts may wear out, especially seals and O-rings. Replace these parts as needed to prevent leaks and ensure the system operates smoothly.
Tip: Keep spare seals, O-rings, and clamps on hand for quick replacements.
Check for Leaks After Installation
After joining or parting any coolant pipes, always check for leaks before using the machine. This will help prevent any damage or coolant loss during operation.
Tip: Perform a simple leak test by running the coolant system at low pressure first.

Conclusion
Joining and parting coolant pipes without special tools is not only simple but also cost-effective and time-saving. By using barbed fittings, twist-lock connectors, and push-fit connectors, you can easily maintain your CNC coolant system. However, it’s important to be mindful of common mistakes and follow proper maintenance tips to ensure the system’s longevity.
With regular inspection and careful handling, your coolant pipes and fittings can continue to serve your CNC machine effectively, helping to avoid costly repairs and keeping your operations running smoothly.