Pneumatic systems are commonly used in a wide range of industries, from manufacturing to automation, due to their reliability and efficiency. These systems rely on air fittings and connectors to ensure proper airflow and functionality. However, the proper cutting and connecting of air fittings is critical to avoid potential problems such as leaks or pressure loss.
If air fittings are not correctly connected, it can lead to inefficiency, increased energy consumption, or even complete system failure. That’s why understanding how to properly cut and connect air fittings is essential for anyone working with pneumatic systems.
This guide will take you through the necessary steps, tools, and techniques to ensure a secure and reliable connection of your air fittings, helping to maintain the optimal performance of your pneumatic setup.
Tools and Materials Needed
Before you begin cutting and connecting air fittings, having the right tools and materials is essential. Using the proper equipment ensures clean cuts and secure fittings, preventing leaks or other issues. Below is a list of the essential tools and materials you will need:
Cutting Tools
- Pipe Cutter: A high-quality pipe cutter is essential for making clean, straight cuts in your tubing. It helps prevent jagged edges that could interfere with the fitting connection.
- Hacksaw (Optional): If you don’t have a pipe cutter, a hacksaw can also be used, though it may require additional steps to ensure the cut is clean.
Deburring Tools
- Deburring Tool: After cutting the tubing, a deburring tool is essential for smoothing out rough edges inside and outside the tubing. This ensures that the fitting will properly seal, avoiding air leaks.
Measuring Tools
- Tape Measure: Accurately measuring your tubing before cutting is crucial for making precise cuts and fitting installations.
- Ruler or Marking Tool: Helps you mark where the cut should be made.
Connectors and Fittings
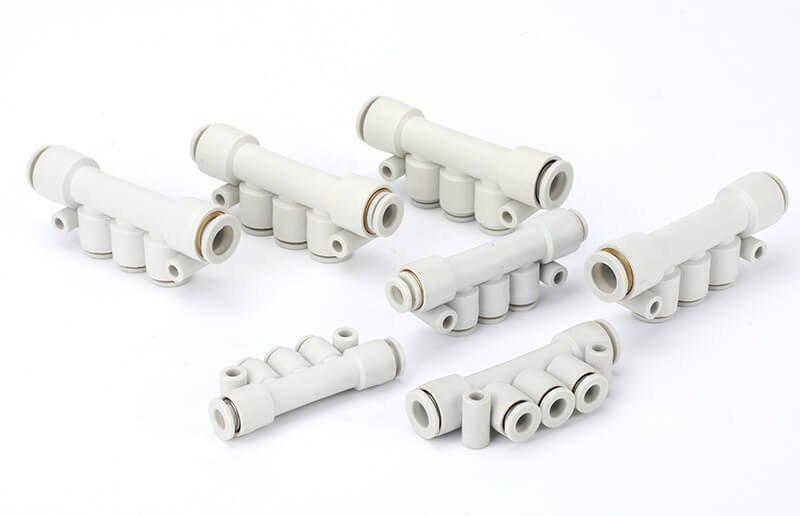
- Push-to-Fit Connectors: These are commonly used in pneumatic systems for easy, tool-free connections.
- Compression Fittings: These fittings use a ferrule to secure the tubing, offering a more permanent connection.
- Barbed Fittings (Optional): Sometimes used for flexible tubing, these fittings require the tubing to be pushed over a barbed section and tightened.
Cleaning Materials
- Cloth or Rag: A clean cloth is essential for wiping down any debris or contaminants from the tubing before connecting it to the fitting.
- Solvent (Optional): If necessary, use a solvent to clean the ends of the tubing, especially if it has been exposed to dirt or grease.
Having these tools on hand will allow you to make precise cuts and ensure that your air fittings are securely connected, leading to a more efficient and reliable pneumatic system.
How to Properly Cut Air Fittings
Cutting the tubing properly is one of the most important steps in ensuring a leak-free and efficient pneumatic system. If the tubing is not cut cleanly, it may not fit correctly in the fittings, leading to air leaks and other issues. Follow these steps to make sure you cut your air fittings accurately.
Choosing the Right Cutter
Before you begin, it’s important to select the right tool for the job. Pipe cutters are generally the best option for cutting tubing because they produce clean, straight cuts. Ensure that the cutter is suited for the material of the tubing (e.g., plastic, copper, or stainless steel). A hacksaw can also be used, but it may require more effort and additional finishing to smooth out the edges.
Step-by-Step Guide to Cutting Tubing
- Measure and Mark the Tubing: Start by measuring the length of tubing you need. Use a tape measure to determine the correct length and then mark it with a pencil or a marker. Accuracy is key to avoid cutting too much or too little.
- Cut the Tubing: Place the tubing in the cutter and ensure it is aligned properly. If using a pipe cutter, tighten the cutter around the tubing and rotate it slowly, applying steady pressure. If using a hacksaw, ensure the blade is aligned at a 90-degree angle to the tubing, and make a straight, even cut.
- Check the Cut: After cutting, inspect the tubing for any rough or jagged edges. A clean, straight cut ensures the fitting will securely seal. If necessary, use a deburring tool to remove any burrs or uneven edges.
Common Mistakes to Avoid
- Uneven Cuts: Ensure the tubing is held firmly in place during the cutting process to avoid angled cuts.
- Jagged Edges: Never skip the deburring process. Rough edges can prevent the fitting from making a proper seal.
Preparing the Fitting and Tubing
Once the tubing is cut, it’s time to prepare both the tubing and the fittings for connection. This step is crucial for ensuring that the fittings will create a strong, leak-proof seal. Here’s how to prepare both:
Deburring the Tubing
After cutting the tubing, it’s essential to remove any rough or sharp edges from the cut. These imperfections can cause leaks and may damage the fitting or the O-rings used for sealing.
- Use a deburring tool to carefully remove any burrs from both the inside and outside of the tubing. This process ensures the tubing will fit snugly into the connector without interference.
- Check for clean edges: Run your finger along the cut to feel for any roughness. A properly deburred edge should be smooth to the touch.
Cleaning the Tubing
Before connecting the tubing to the fitting, it’s important to clean the tubing to ensure there is no dirt, oil, or debris that could affect the seal. Even small particles can interfere with the connection and cause leaks.
- Use a clean cloth or rag to wipe down the tubing. If necessary, you can use a mild solvent to remove grease or other contaminants. Be sure to allow the tubing to dry thoroughly before continuing.
Inspect the Fitting
It’s just as important to prepare the fitting as it is to prepare the tubing. Check the fitting for any signs of damage or dirt.
- Ensure the fitting is clean and free from any debris that could prevent a secure connection.
- Inspect the O-rings or seals inside the fitting. If these are damaged or worn out, replace them before proceeding.
How to Properly Connect Air Fittings
Properly connecting air fittings is crucial for ensuring a leak-free and efficient pneumatic system. A secure connection will ensure that the system performs optimally and minimizes the risk of failure. Below are the steps to connect air fittings correctly.
Selecting the Right Fitting
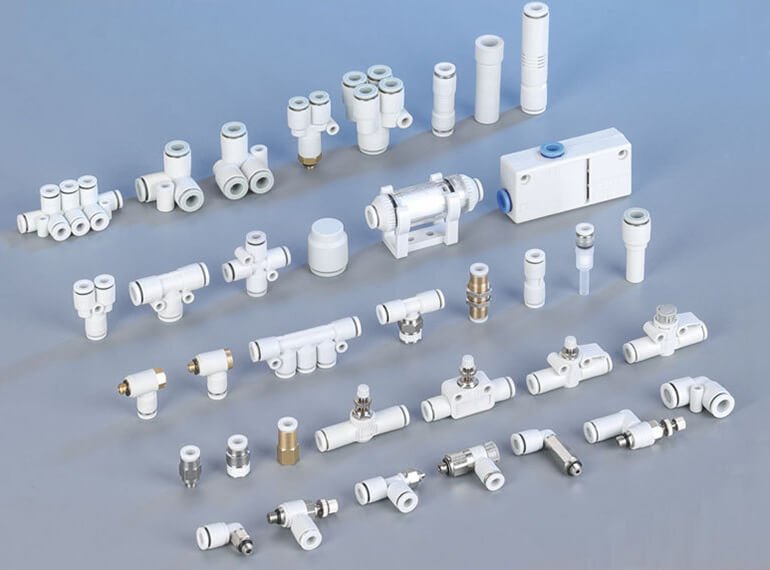
Before making any connections, it’s important to choose the appropriate fitting for your tubing and system requirements. The most common types of fittings used in pneumatic systems are:
- Push-to-fit Connectors: These fittings are simple to install and require no tools. The tubing is pushed into the connector, and the fitting holds it in place.
- Compression Fittings: These fittings use a ferrule to clamp the tubing securely in place, offering a more permanent and robust connection.
- Barbed Fittings: Used for flexible tubing, these fittings have barbs that grip the inside of the tubing for a tight connection.
Step-by-Step Guide to Connecting
- Insert the Tubing into the Fitting: Once the tubing is cut and prepared, insert it into the fitting. For push-to-fit connectors, simply push the tubing in until it is fully seated. For compression fittings, slide the tubing through the fitting and tighten the nut to secure it.
- Ensure Proper Alignment: As you insert the tubing, make sure it is straight and aligned properly inside the fitting. Misalignment can cause leaks or damage the tubing over time.
- Tighten the Fitting: For compression fittings, tighten the nut until the tubing is held securely in place. Be careful not to overtighten, as this can damage the tubing or the fitting.
- Check for Leaks: Once the fitting is in place, it’s important to check for leaks. Apply pressure to the system and look for any signs of escaping air, such as hissing sounds or air bubbles (if using a soapy water test). If you detect any leaks, disassemble the fitting, check for alignment, and retighten.
Ensuring a Tight Seal
- Push-to-fit fittings generally don’t require any tools for installation, but make sure the tubing is pushed all the way into the fitting to ensure a tight seal.
- Compression fittings require proper tightening to avoid leaks, but be careful not to overtighten and risk damaging the fitting or tubing.
Tips for Successful Connections
Making sure that your air fittings are properly connected is key to maintaining the efficiency and safety of your pneumatic system. Here are some tips to help ensure successful and secure connections:
1. Ensure Proper Tubing Alignment
Always check that the tubing is properly aligned with the fitting. Misalignment can cause the fitting to fail or result in leaks, leading to inefficient operation. Keep the tubing straight and insert it fully into the fitting to ensure it is seated correctly.
2. Avoid Over-Tightening
When tightening compression fittings or threaded fittings, be careful not to over-tighten. Over-tightening can damage the fitting, the tubing, or the O-rings inside the fitting, leading to leaks or premature wear. Tighten the fitting just enough to create a secure seal.
3. Regularly Inspect Connections
After connecting the fittings, it’s important to regularly inspect them to ensure they remain secure. Vibration or movement in pneumatic systems can sometimes loosen connections, so always keep an eye out for signs of wear or loose fittings. Tighten them as needed to prevent leaks.
4. Use Lubrication When Necessary
Some types of fittings, such as compression fittings, may benefit from a small amount of lubricant to ensure a smooth and secure connection. Be sure to use the correct type of lubricant for your fittings and avoid excessive use.
5. Test the System for Leaks
After connecting the fittings, always conduct a leak test. This can be done by applying pressure to the system and listening for any hissing sounds or using soapy water to check for air bubbles. If you detect any leaks, disassemble and reconnect the fittings.
6. Replace Damaged Fittings
If you notice any damage to a fitting, such as cracks, chips, or wear on the O-rings, replace the fitting immediately. Damaged fittings can lead to leaks or system failure.
Troubleshooting Common Issues
Even with careful preparation and installation, issues can still arise when working with air fittings. Understanding common problems and how to resolve them is essential for maintaining a functioning pneumatic system. Below are some of the most common issues and their solutions.
Leaks in the Connection
Leaks are one of the most common issues encountered with air fittings. They can occur due to improper cuts, poor alignment, or damage to the fittings.
- Possible Causes:
- Rough or uneven cuts on the tubing.
- Misalignment of the tubing within the fitting.
- Damaged O-rings or seals in the fitting.
- Solution:
- Inspect and replace any damaged parts: Check for damaged O-rings, cracks, or worn seals in the fitting.
- Re-cut the tubing if necessary: Ensure that the tubing has a clean, smooth cut with no burrs or jagged edges.
- Realign the tubing: Ensure the tubing is properly aligned within the fitting before tightening.
- Perform a leak test: If the leak persists, try tightening the fitting or using a sealant to ensure a better seal.
Loose or Misaligned Fittings
Another common issue is loose or misaligned fittings, which can result in a weak connection or air loss.
- Possible Causes:
- Improperly tightened fittings.
- Misalignment of the tubing during installation.
- Solution:
- Re-tighten the fitting: If the fitting is loose, gently tighten it, but avoid over-tightening.
- Re-align the tubing: Make sure the tubing is inserted straight into the fitting and properly seated.
Airflow Issues
If your system is not functioning at optimal pressure, it may be due to airflow restrictions or improperly connected fittings.
- Possible Causes:
- Clogged or damaged tubing.
- Obstructions in the fittings.
- Solution:
- Clean the fittings and tubing: Make sure there is no debris or contamination inside the system.
- Inspect for damage: Check for any cracks, bends, or damage to the tubing that might restrict airflow.
Conclusion
Properly cutting and connecting air fittings is a vital skill for anyone working with pneumatic systems. A secure and leak-free connection ensures that the system operates efficiently, reducing energy waste and extending the lifespan of the equipment. By following the steps outlined in this guide, you can confidently handle the cutting, connecting, and maintenance of your air fittings.
Remember to use the right tools, prepare the tubing and fittings properly, and test for leaks after installation. In addition, be aware of common issues, such as leaks or loose fittings, and address them promptly to maintain system performance. Regular maintenance and inspections will help you avoid major issues down the line and ensure your pneumatic system continues to operate smoothly.
By following these best practices, you’ll ensure a reliable and efficient connection every time. Proper care and attention to detail will lead to a safe and effective pneumatic system, maximizing both performance and longevity.